Consent Process to Deploy E-Visor Entry/Basic

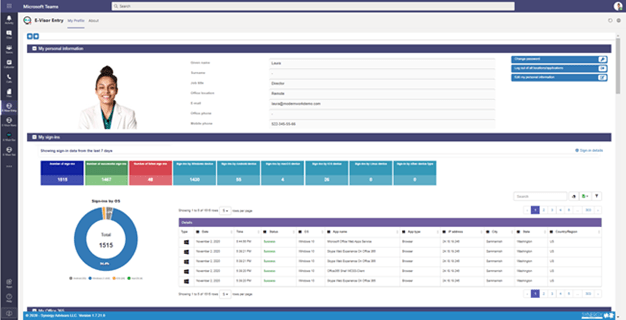

 Let’s look at the install process for E-Visor for Teams Entry and Basic version.
These versions do not require any Azure components installed on the customer’s tenant or any type of installation/configuration/set up beyond installing the application from the marketplace and providing admin/user consent for the application to read and return profile and usage data.
First, the application needs to be installed. This can be initiated manually by the end user by simply installing the application from the marketplace. It can also be initiated on an organization-level by the administrator.
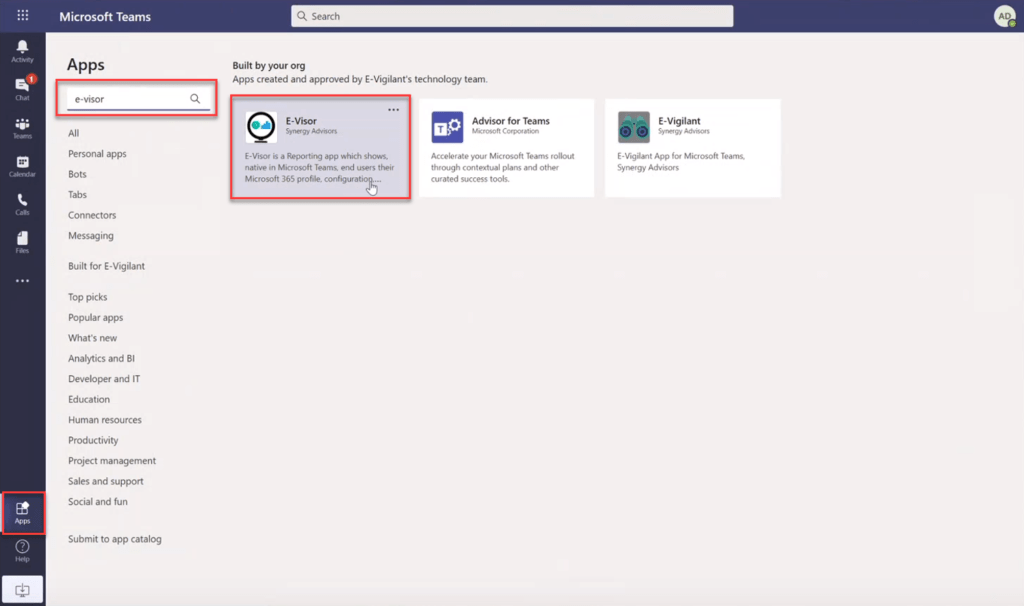
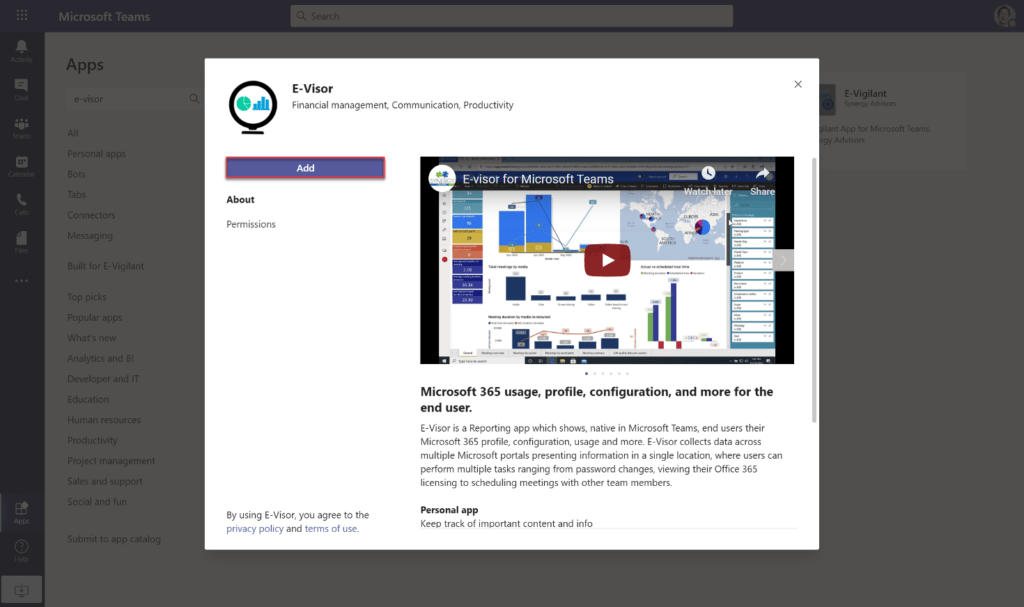
After the installation is complete, User will need a final Consent from the organization IT Administrator in order for the data to be displayed. Please follow the process for End User or Administrator respectively, in the tabs above.
Prerequisites:
Office 365 or
Microsoft 365
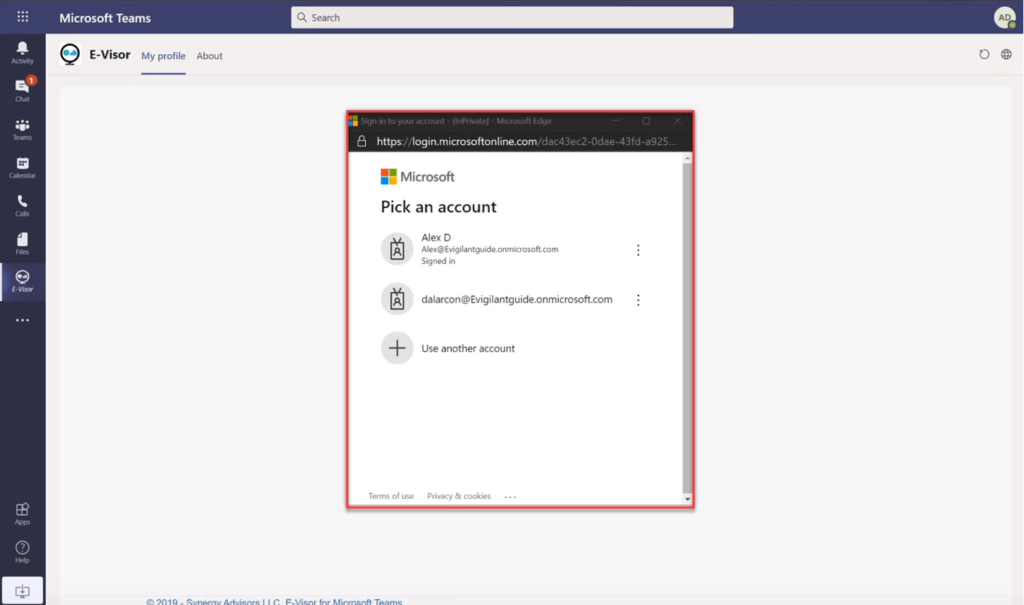
1Log In the installed E-Visor app, use your organization credentials and password. The following screens will show up.
2Accept permissions. The application presents a permissions required list to read user’s profile and usage data and return it to the end user. These permissions enable E-Visor to view data and display it to the logged-on user only. We value your privacy, this data is only for you. E-visor does not share your information with other users or store outside of your organization.
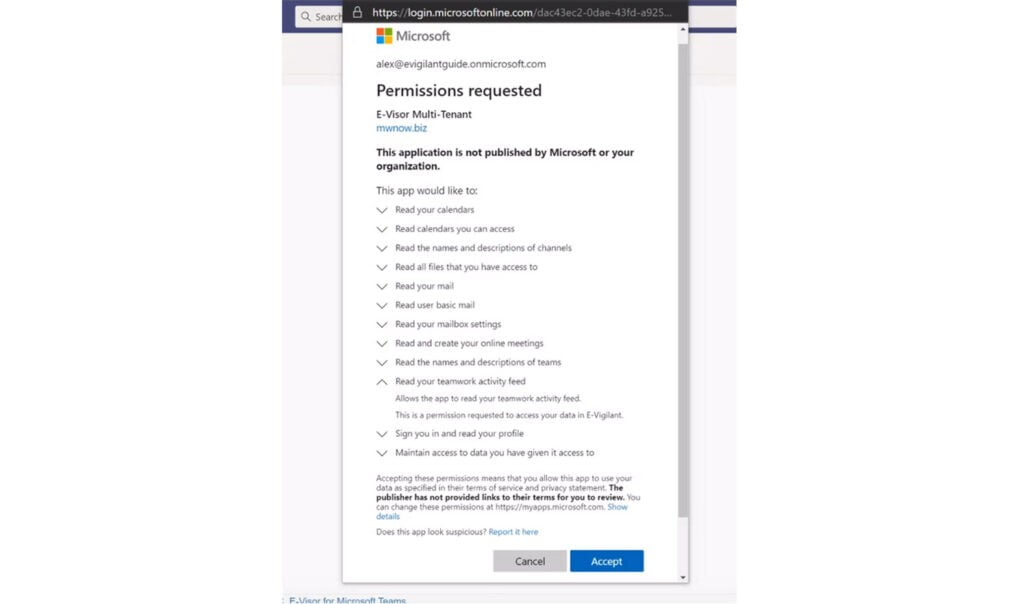
3 Admin consent. At this point you can see only your personal data. To get all data populated and use all E-visor capabilities. You may also need consent from the Administrator. A user with hi-level permissions.
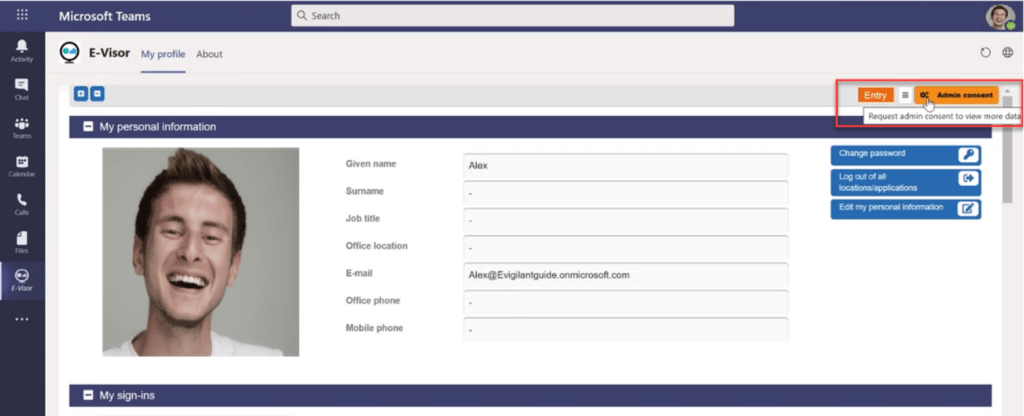
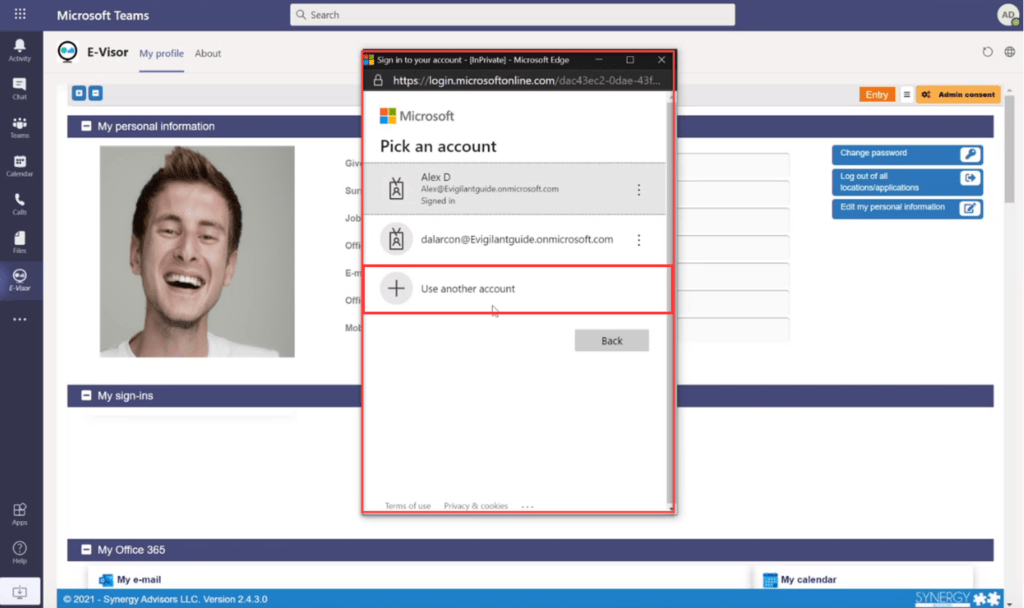
Click the upper right Admin consent button. New login window will be displayed. The Administrator user need to login directly on you device, (in person or at remote assistance) selecting from login window “Use another account”
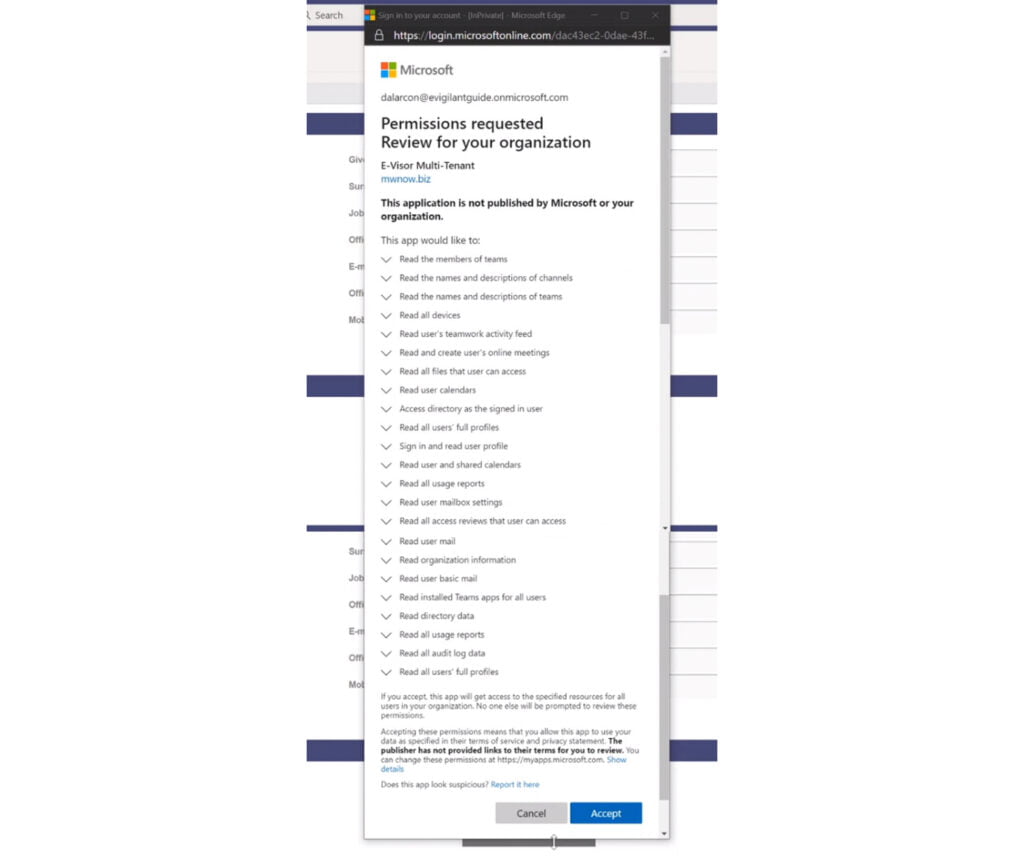
By clicking on accept in permission window, Administrator grants you and grants to all future users complete access to all E-visor functions.
Enjoy the app. Once you refresh the site, all data will be populated and admin consent button disapear
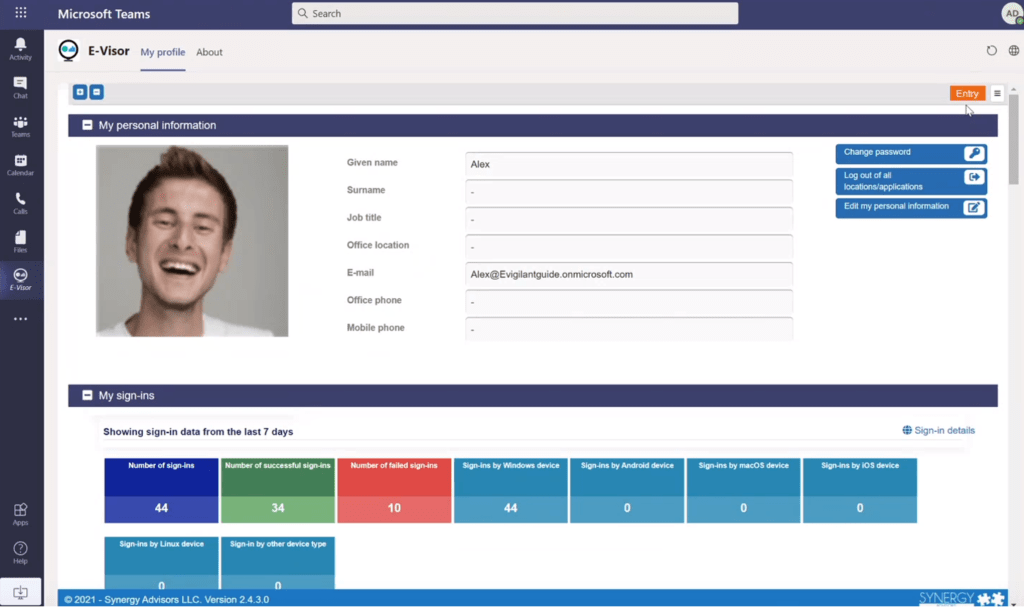
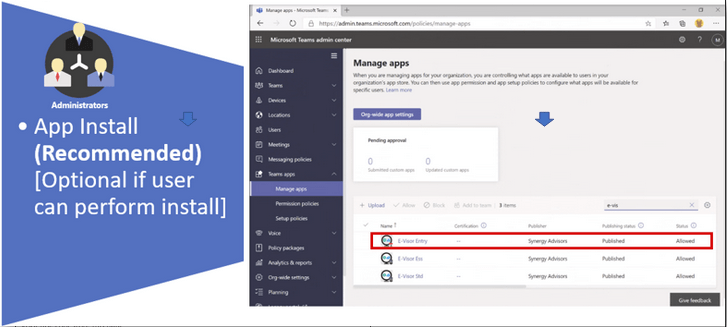
1.Install app form teams marketplace. Here we show the process to install the application at an organizational level, by the Admin, rather than relying on the end user to install from the Teams marketplace. This operation is quickly performed from the Teams admin center.
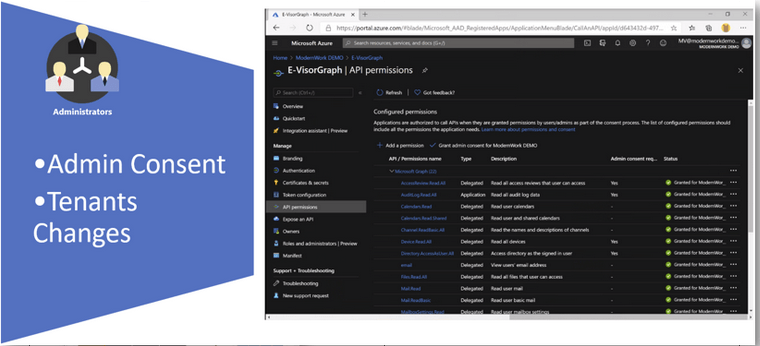
2.Grant admin consent in AAD blade. Granting consent at the administrator level is a quick process performed in Azure Active Directory. The admin simply needs to find the application in the AAD blade and click Grant admin consent. Admins can see the permissions required. As stated before, we simply need read permissions to different M365 services to return the data to the end user. No data is sent outside the customer tenant. Data is not collected by Synergy Advisors.
I need more support
Or you may reach us at (+1) 425-689-3310
©2020 Synergy Advisors LLC. ALL RIGHTS RESERVED.
