Consent Process to Deploy E-Visor Entry/Basic

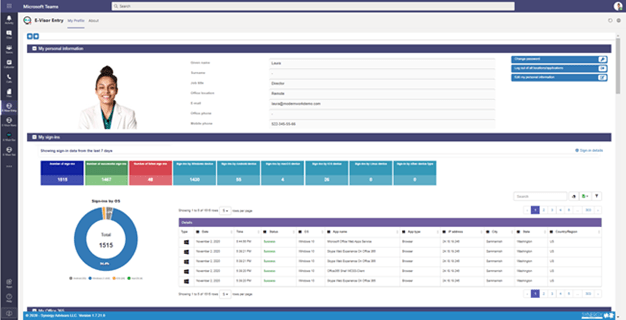


Let’s look at the process to install the E-Visor for Teams Entry and Basic version
and provide administrator consent.
This process can be initiated manually by the end user by simply installing the application from the marketplace. It can also be initiated on an organization-level by the administrator. Please follow the process for End User or Administrator respectively, in the tabs above.
Prerequisites
- Access to the Microsoft Teams application and Teams app store.
- Access over HTTPS to the following URLs: *.enterprisesuite.biz, *.synergyadvisors.biz, and graph.microsoft.com
- Verify that your organization is not blocking third-party Teams applications
- An Azure AD Premium license is required to show sign-in information.
- No cost required; the app is available for a free trial to up to 100 users per tenant.
- No setup or supporting requirements are needed; E-Visor Entry and Basic do not require any additional hardware or software components to be installed in the customer environment. No Azure costs are incurred by the customer.
The following steps show how an end user can manually install the application from the Microsoft Teams app store. Once the app is installed, end users may be presented with a consent request for the E-Visor app to collect data. Each user needs to approve this request until the request is performed at the administrative level. After an admin enables the required permissions, end users will not see this information during installation.
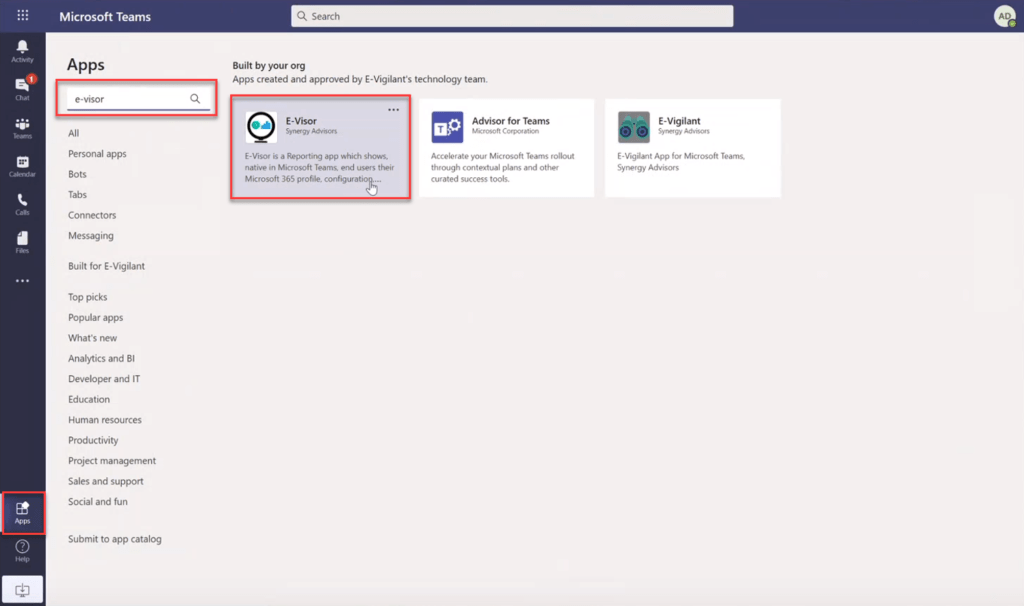
1Open Microsoft Teams and click the Apps icon, located in the bottom left corner. Search for E-Visor and select the available app.
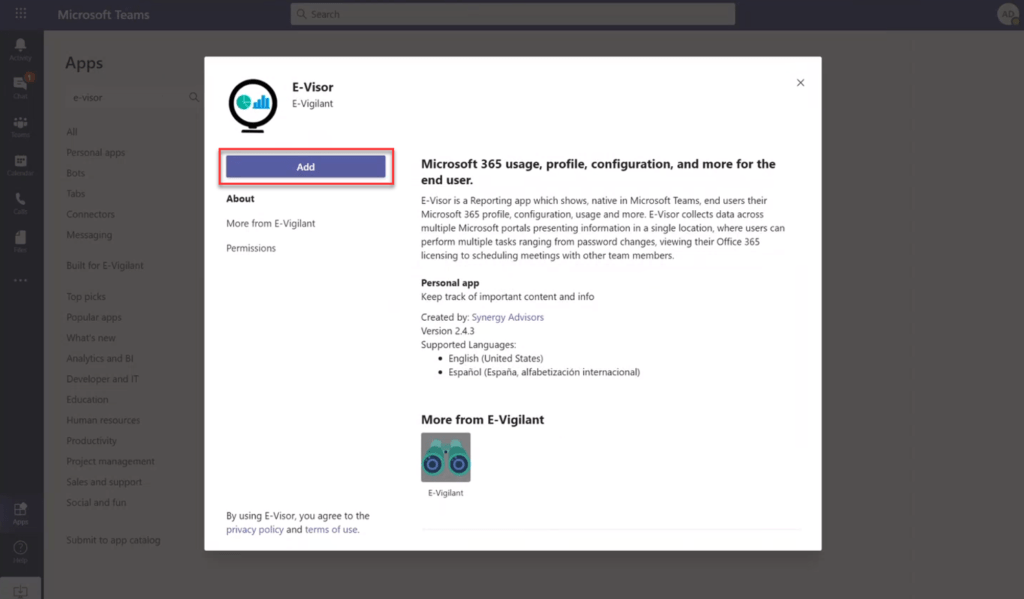
2In the pop-up window, click Add.
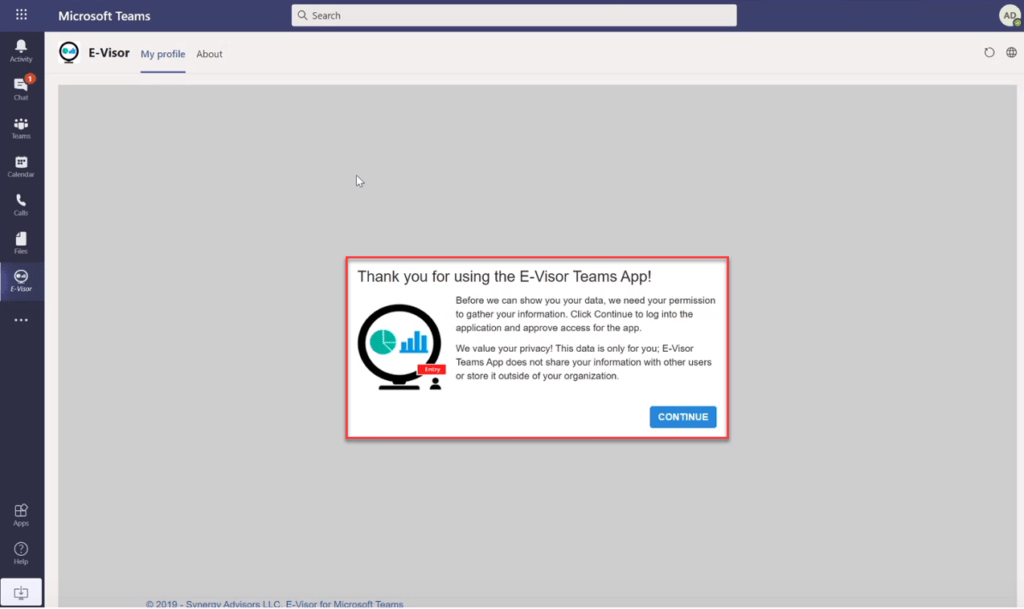
3 Read the welcome message and then click Continue.
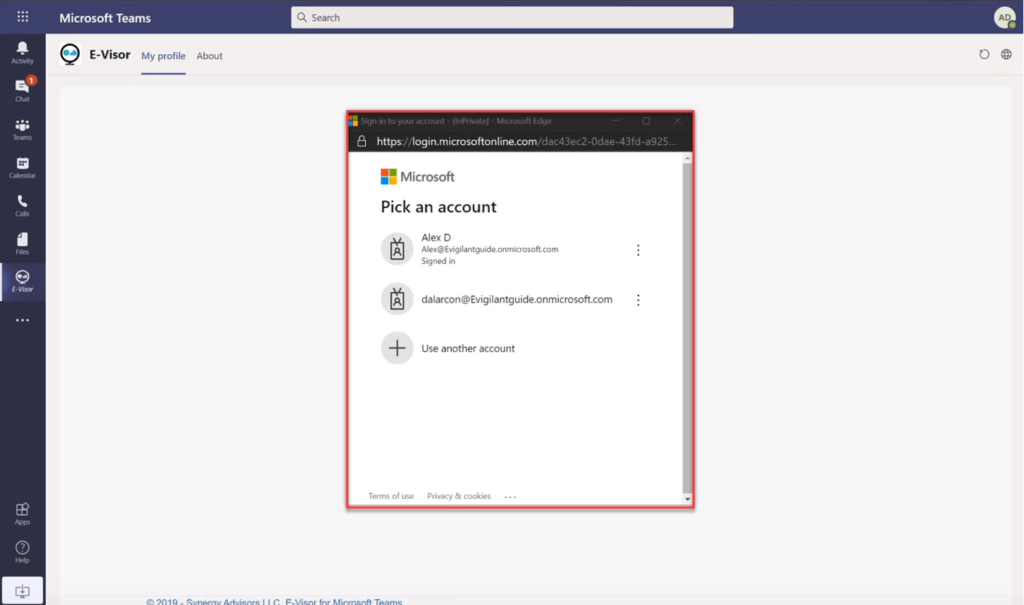
4If your administrator has previously enabled the application, you may skip to step 6. Otherwise, you must agree to the permissions required by the application to retrieve and present your data. This data is for your eyes only; it is not kept by, or sent to, Synergy Advisors or other third party. Select your user account to continue.
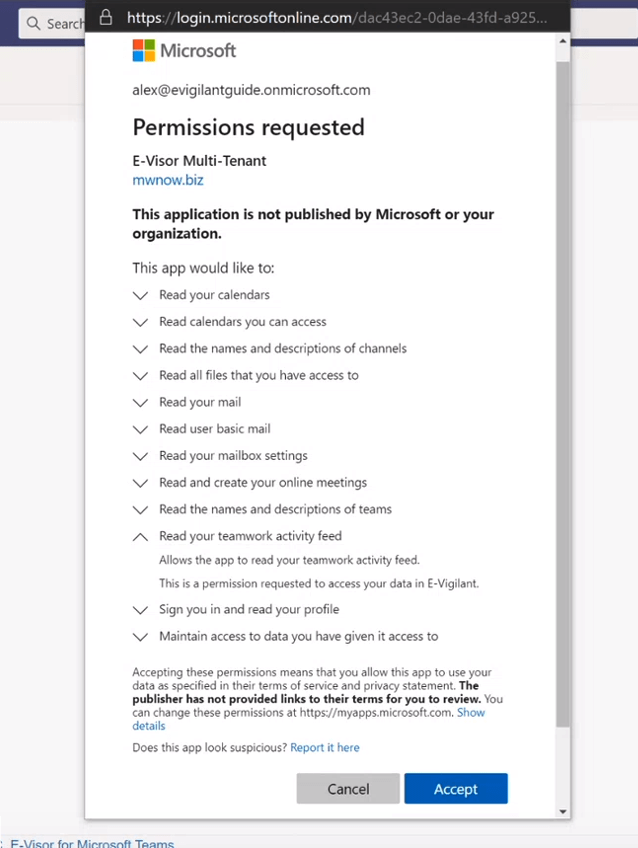
5Review the permissions required by the E-Visor application to retrieve and present your data to you and then click Accept.
6Review the thank you message and then click Continue.

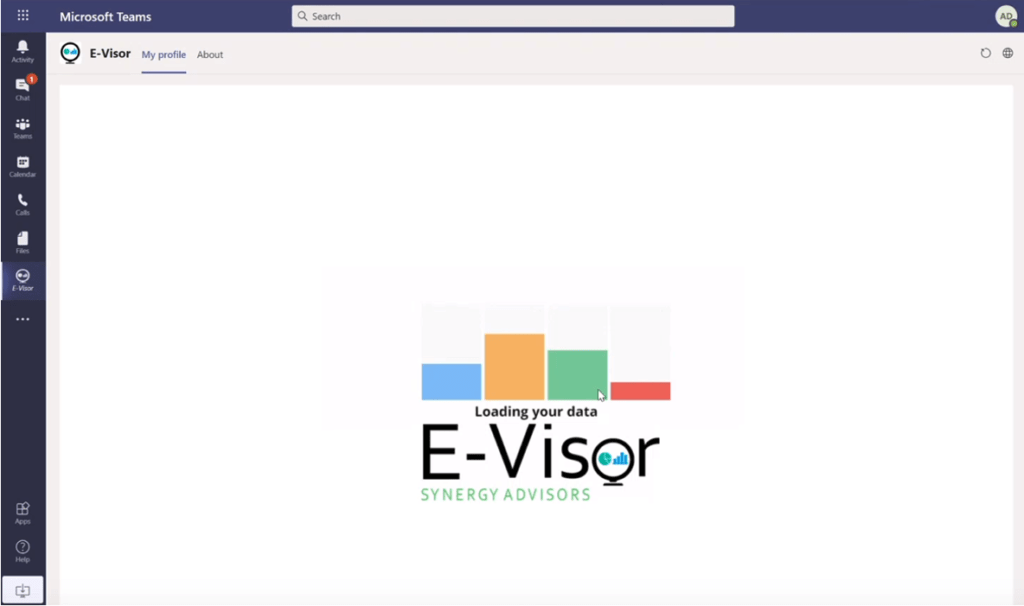
7E-Visor then begins to load your data and present it back to you. The first time the app retrieves your data, it may take a couple of minutes to complete.
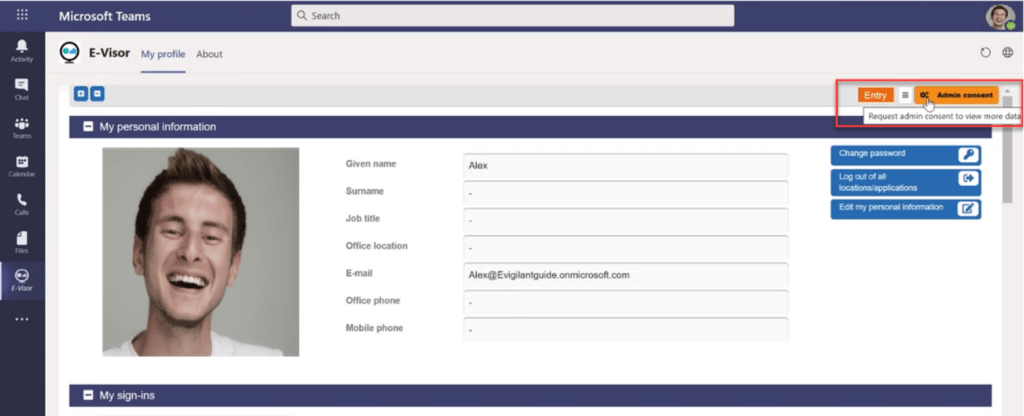
8Once the application loads, you can start to view your profile and configuration information. Note that if an Admin consent option appears in the upper right corner of the application, some of your data will be unavailable until an administrator in your organization enables the permissions necessary for the application to retrieve that additional data. An admin can complete this task by following the steps in the next tab.
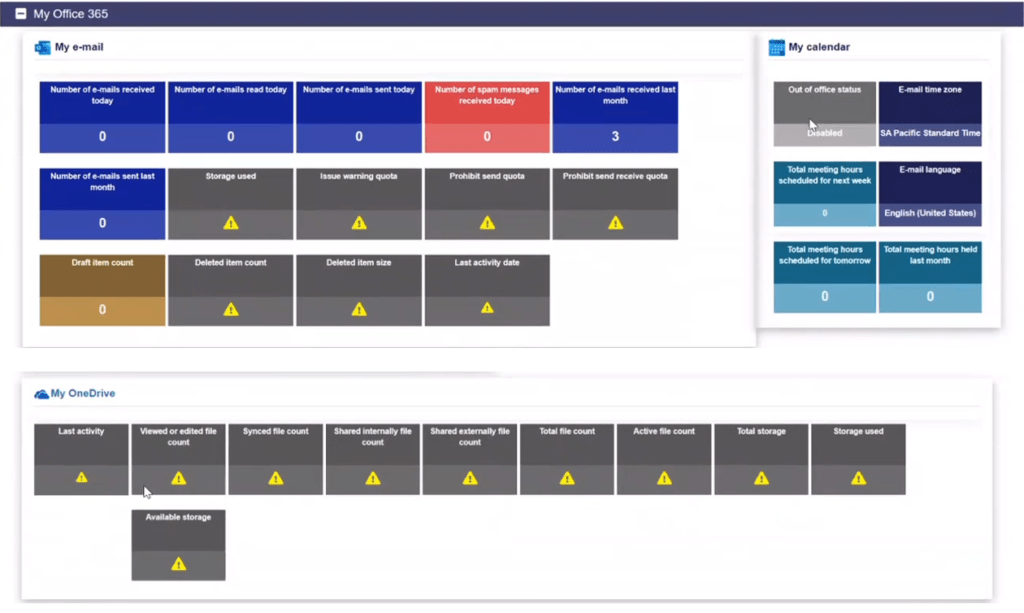
The following steps describe how an administrator can deploy the E-Visor application on behalf of end users from the Teams Admin Center. Note that it may take a few hours after completing these steps before the application appears to the end user
1Open the Teams Admin Center with an account with Global Admin or Teams Service Admin credentials
2Click the Teams apps icon and then click Setup Policies.
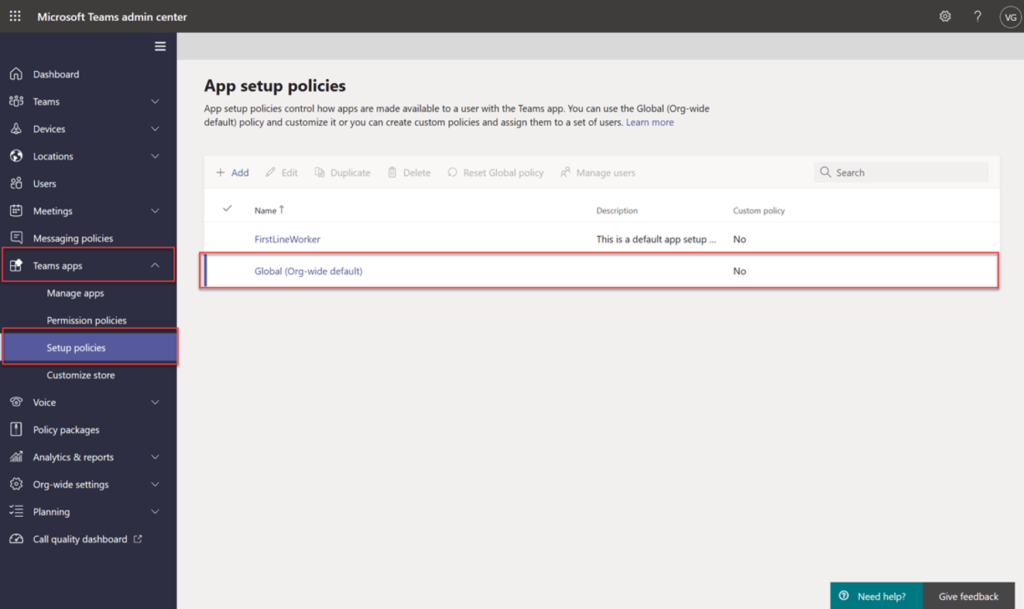
3Choose one of the available Setup Policies or click Add to create a new Setup Policy. Note that Entry is available as a free trial, which can be deployed to up to 100 users per tenant. Users deploying the Entry version beyond the 100 license maximum will receive a message that no licenses are available.
4In the Installed apps section, click Add apps.
5Search for, and then select, the E-Visor application. Click Add and then click Add again.
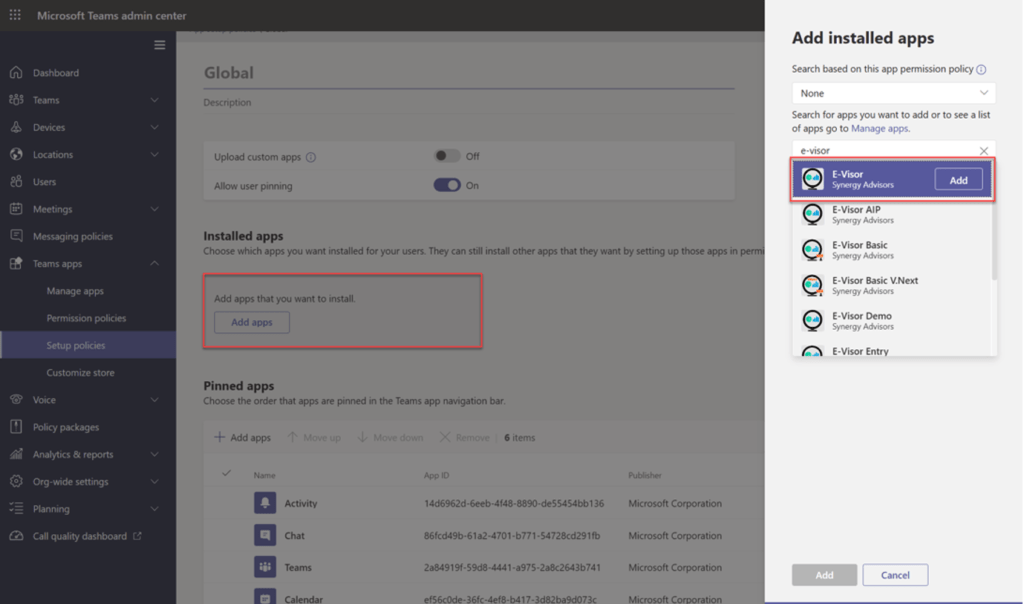
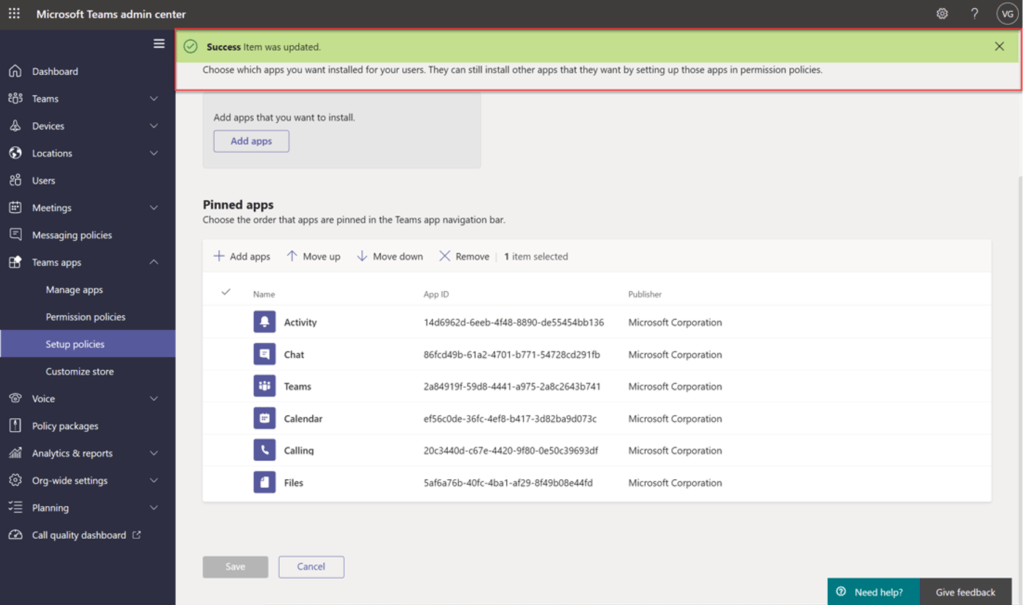
6Optionally, to pin the application to the App bar, click the Add apps button in the Pinned apps section. Search for, and then select, the E-Visor application. Click Add and then click Add again. If desired, select the app and change the order it is displayed using the Move up and Move down buttons.

7Click Save
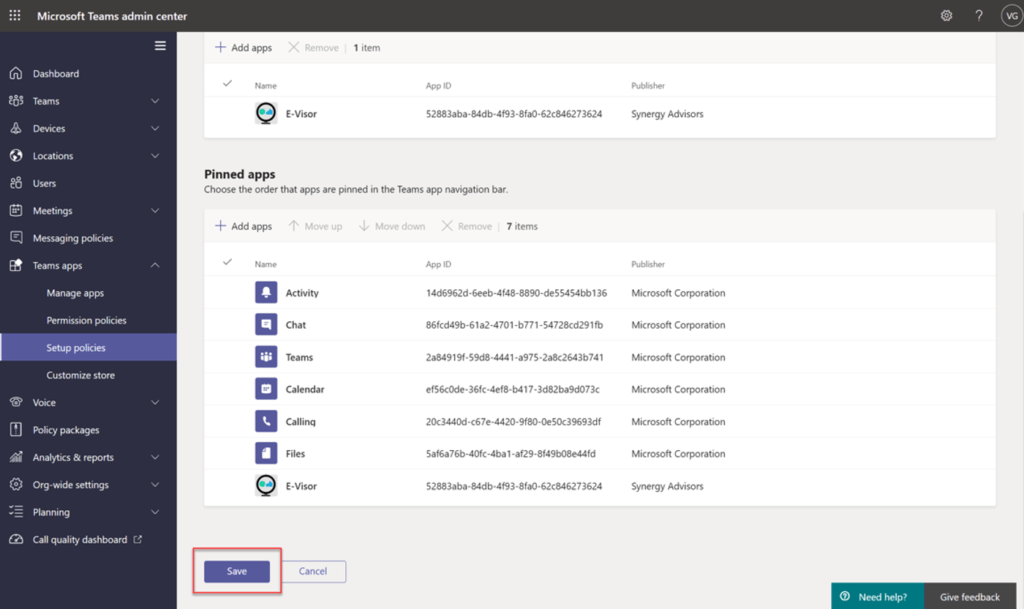
8Verify that the process completes successfully.
The following steps describe how an administrator can enable the permissions required for the E-Visor app to retrieve and present data to the end users. Completing the admin consent process provides the following benefits:
- Data previously unavailable, such as sign-in information, can be retrieved and presented to the end user.
- End users do not need to manually complete the user consent process.
Administrators can complete this process from the Teams application or through the Azure Portal. This process only needs to be completed once per tenant.
Through Teams Application
First, we will look at the experience to provide administrative consent through the Teams application.
1To configure the administrative consent from the Teams application, log into Microsoft Teams and navigate to the E-Visor app. Select the Admin Consent option, located in the upper right corner of the application.

2Select or enter an administrative account to continue.
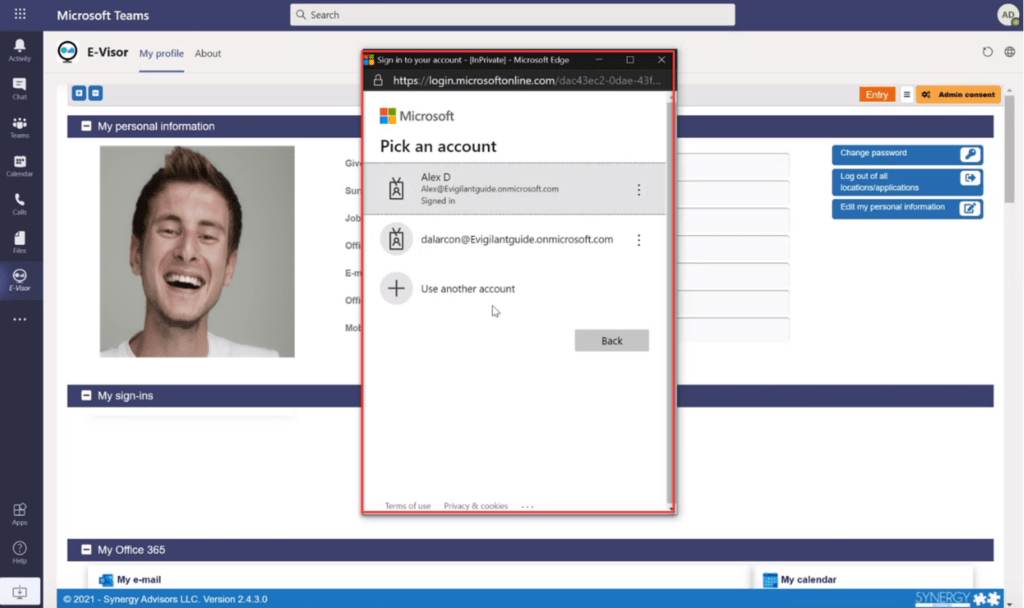
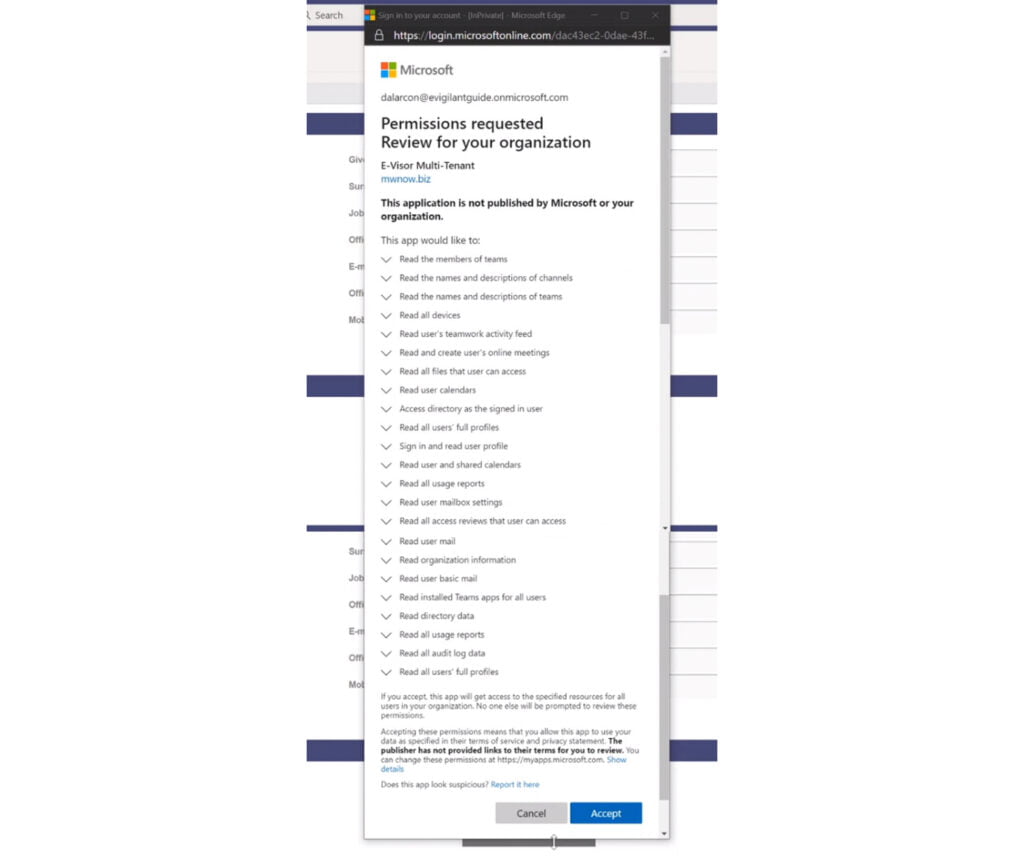
3Review the permissions required by the E-Visor application to retrieve and present your data to you and then click Accept.
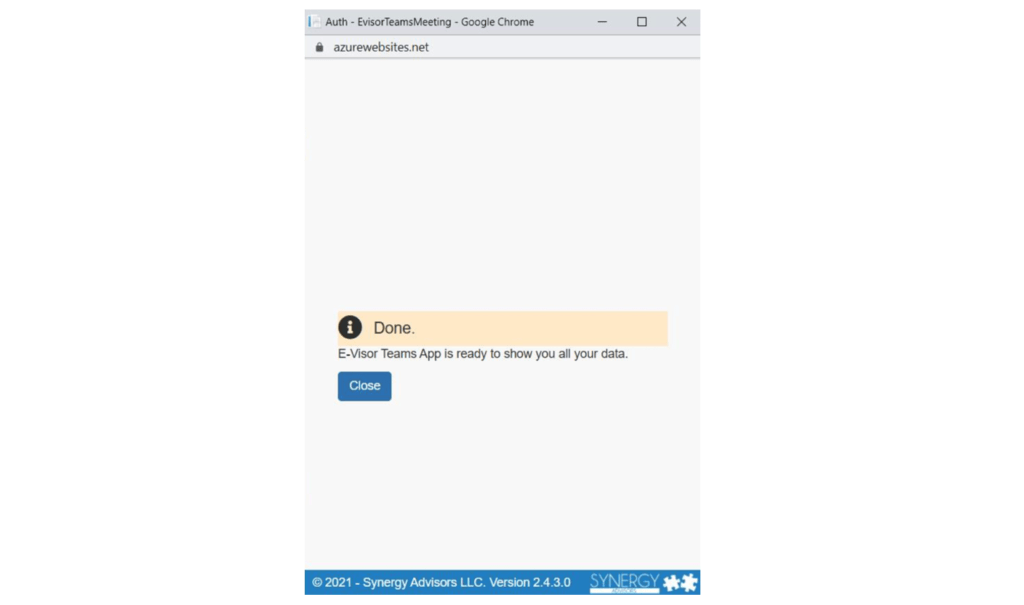
4Click Close to continue.
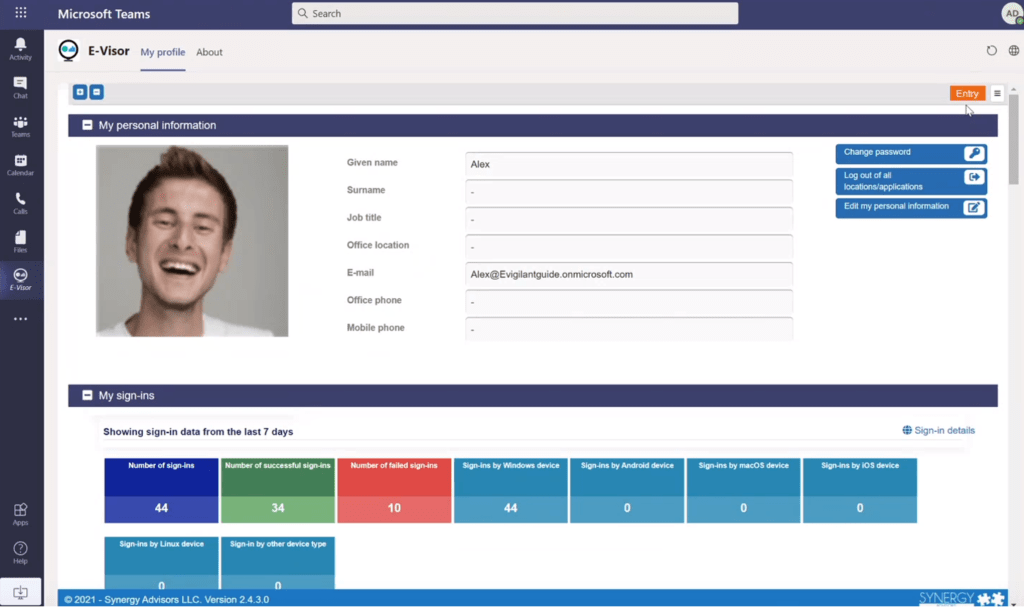
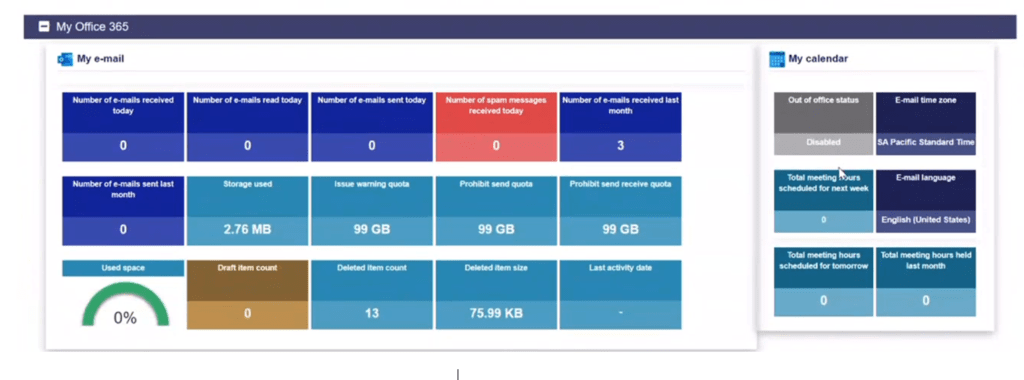
4Refresh the application and notice that the app is now able to retrieve and present all available information.
Through the Azure Portal
Now we will look at the experience to provide administrative consent through the Azure Portal.
1To configure the administrative consent from the Azure Portal, log into the Azure Portal with administrative permissions.
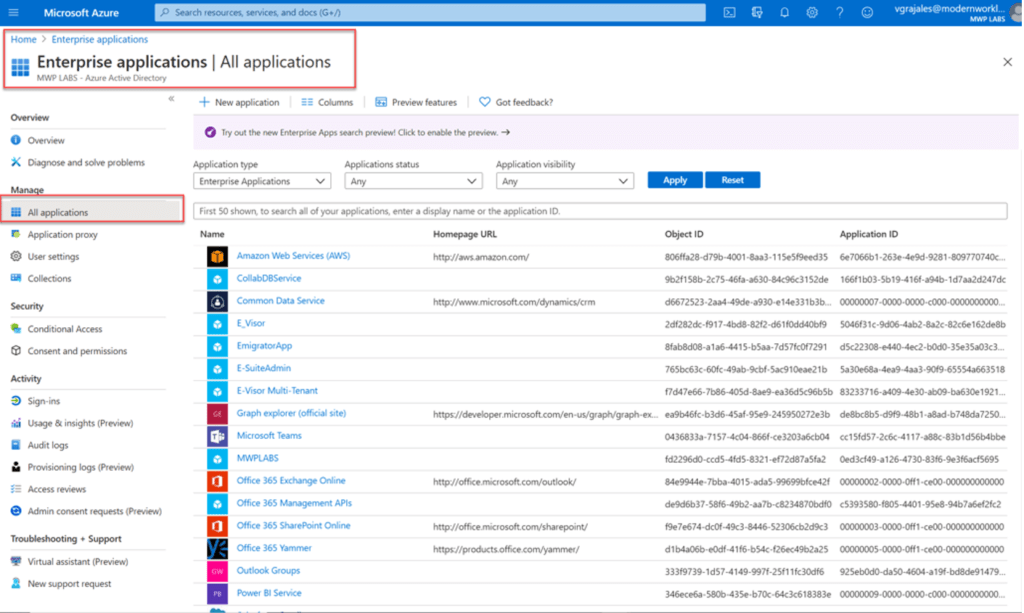
2Open the Enterprise applications blade and click All applications, located in the Manage section, to display all applications in the tenant.
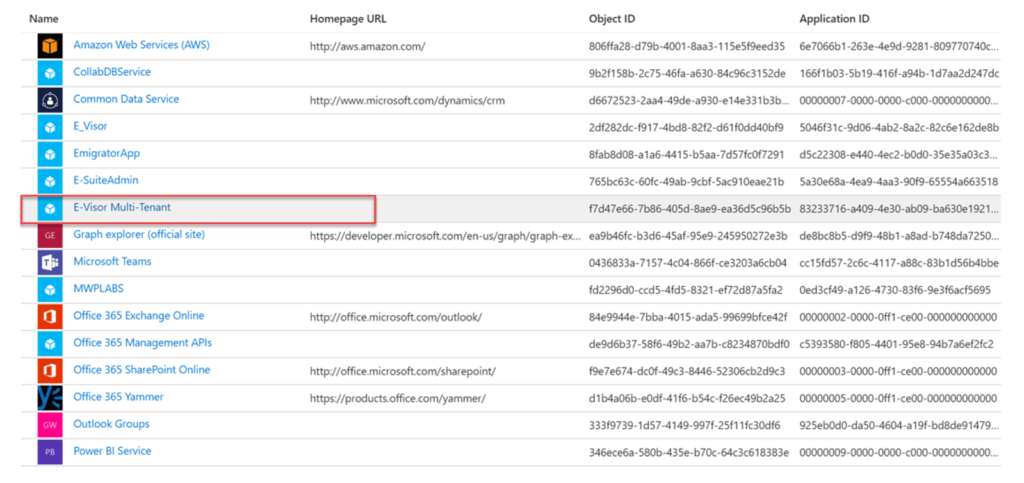
3Click E-Visor Mulit-Tenant.
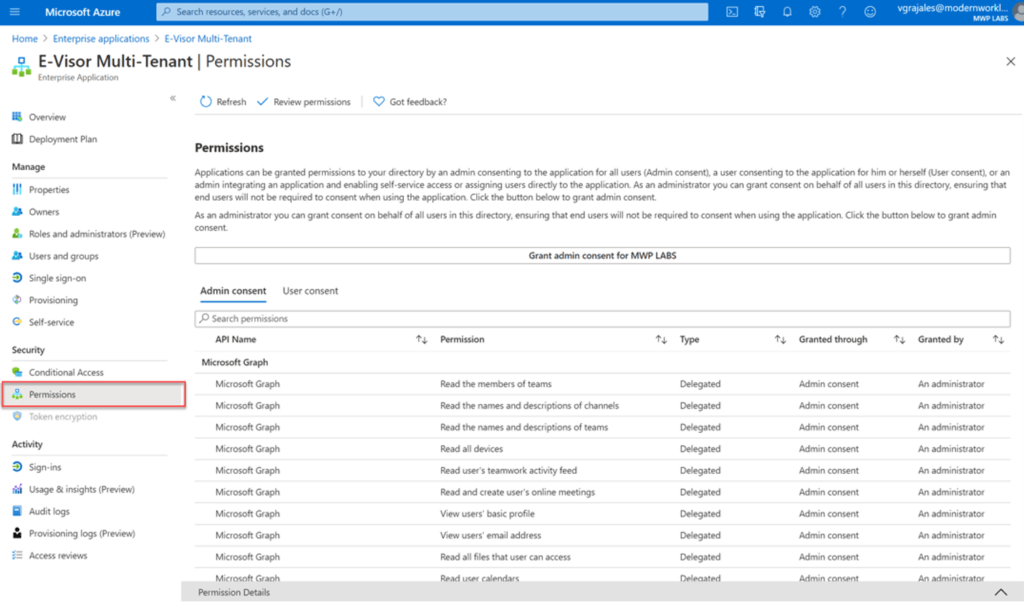
4Click Permissions, located in the Security section, to open the Permissions blade.
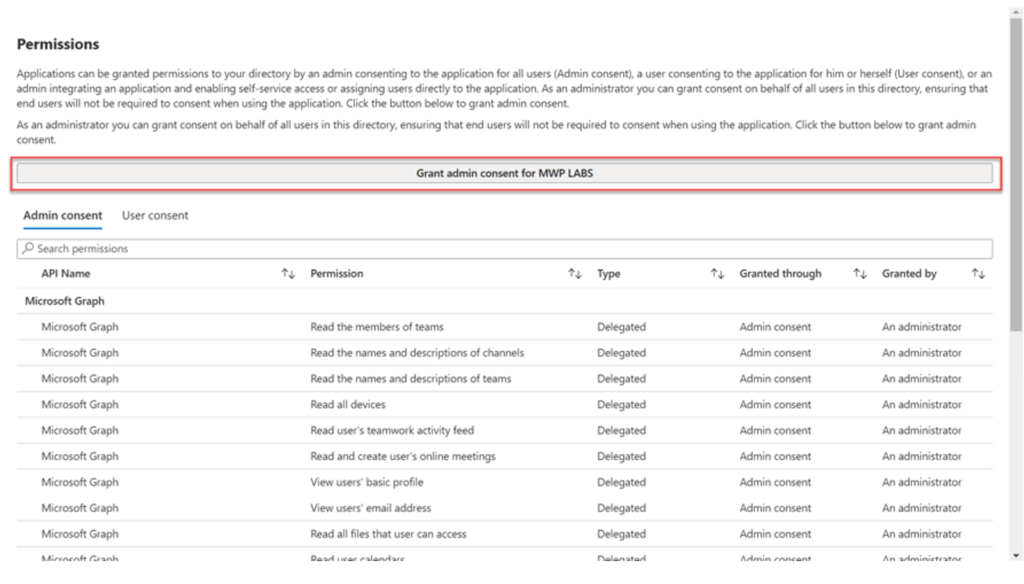
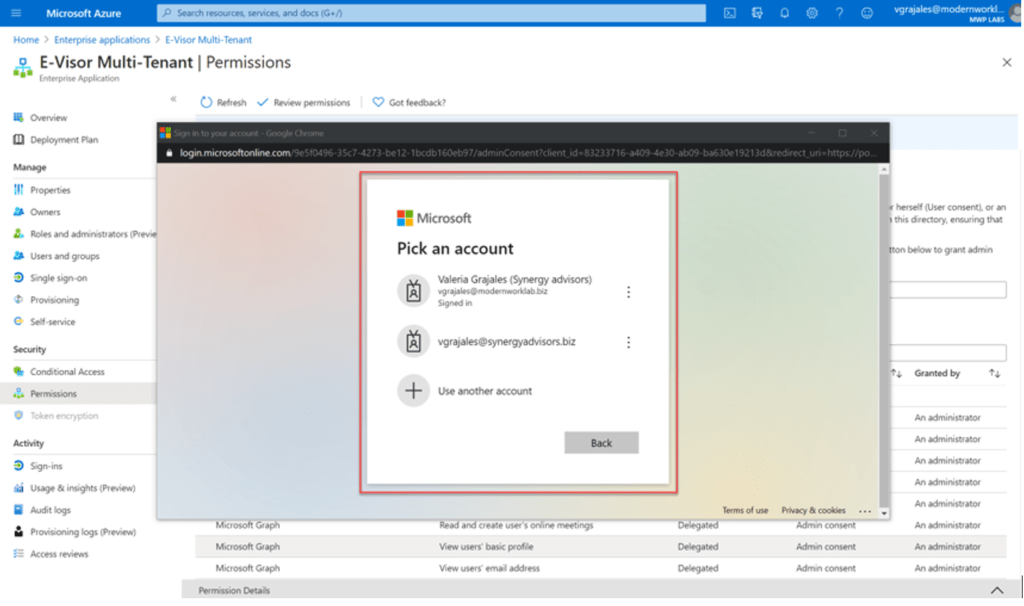
5Click Grant admin consent for Organization. If a sign-in prompt appears, select or enter the appropriate account to continue.
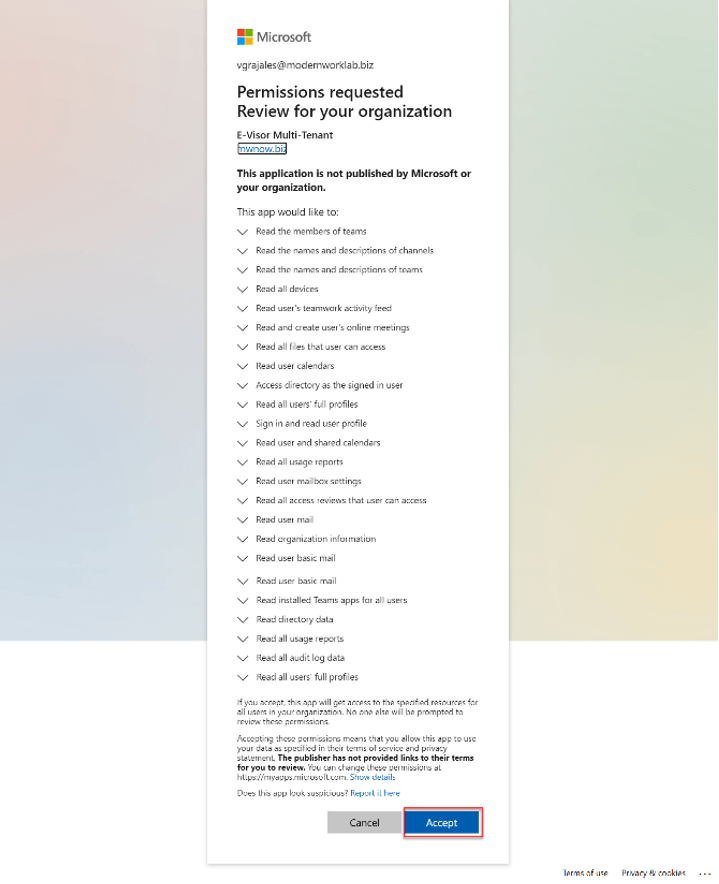
6Review the permissions required by the E-Visor application to retrieve and present your data to you and then click Accept.
7Verify that the action completed successfully.

I need more support
Or you may reach us at (+1) 425-689-3310
©2020 Synergy Advisors LLC. ALL RIGHTS RESERVED.
